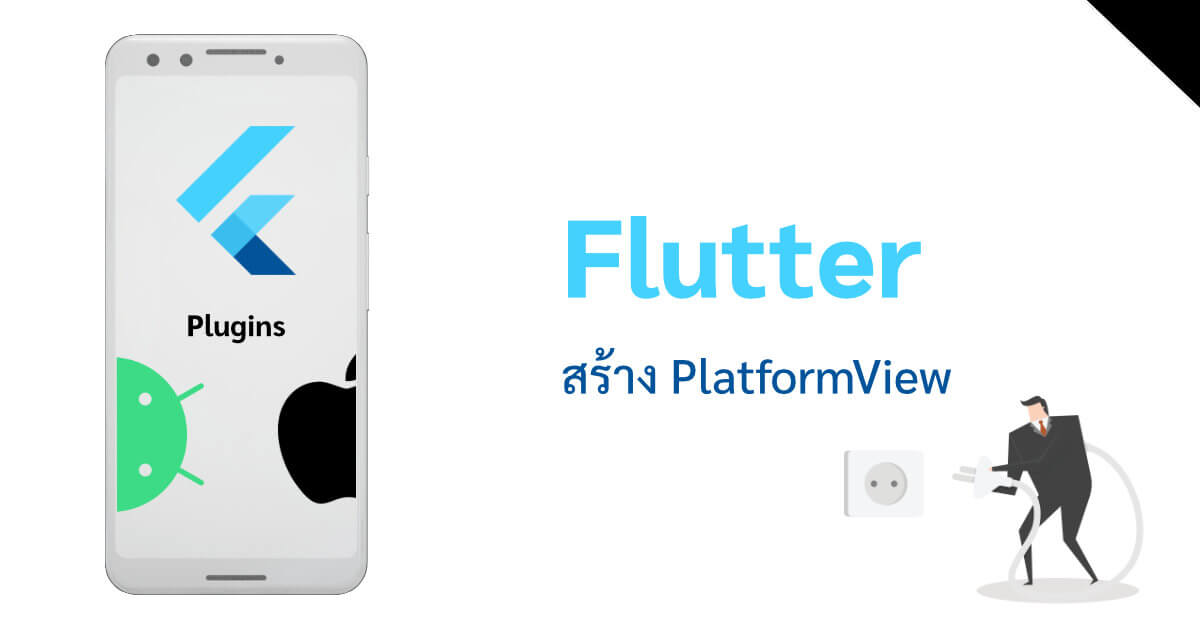
# ใช้ PlatformView แสดง Native View บน Flutter
#Dev#Flutter#Pluginบางครั้งเราอาจจะต้องเขียน Plugin ที่ใช้แสดง View ที่ต้องใช้ความสามารถในฝั่ง Native ด้วย (เช่น Google Maps, Webview, Camera เป็นต้น) ในความโชคดีก็คือหลายๆตัวมันก็มีคนเขียนให้เราใช้ได้เลยแล้วแหละ แต่ถ้าเกิดเราโชคร้ายไม่มีคนเขียนให้เลยเราก็ต้องลงไปลุยเขียนเองครับ
ซึ่งแน่นอนว่าการจะเขียนได้นั้นต้องพอมีความรู้ในการเขียน Native สักนิดสักหน่อย ไม่ว่าจะเป็นภาษา Kotlin (Android) หรือ Swift (iOS) ซึ่งผมพอเข้าใจ Kotlin บ้างเล็กน้อย...ส่วน Swift นี่ไม่รู้เรื่องเลย 🤣
ในบทความนี้จะสอนวิธีเขียนตั้งแต่ต้น และพยายามอธิบายให้เข้าใจเขียนเองได้ครับ
# เตรียมความพร้อมสิ่งที่ต้องมี
- Android Studio ที่ติดตั้ง Flutter Plugin แล้ว
- ความรู้พื้นฐานในการเขียน Plugin ผมเคยเขียนไว้แล้วครับที่บทความนี้ Simple Plugin แต่จะไม่อ่านก็ไม่น่าจะเป็นอะไร เพราะไม่ได้ลงลึก
# สร้างโปรเจค Flutter Plugin
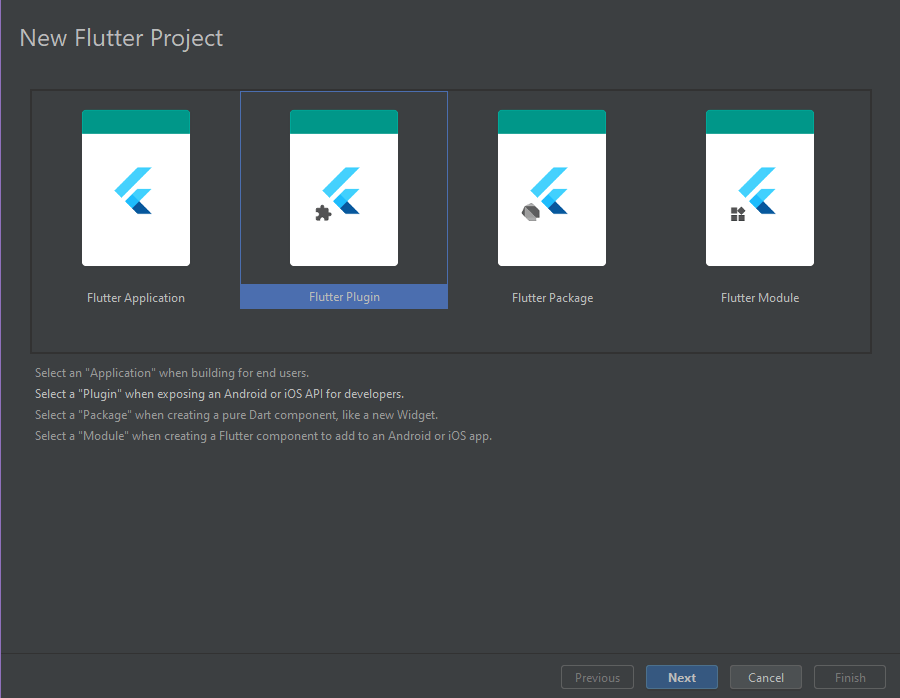
เปิด Android Studio ขึ้นมาแล้วกดสร้างโปรเจค Flutter

เลือกสร้าง Flutter Plugin
ในที่นี้ผมจะทำ Plugin สร้าง TextView (ซึ่งก็เหมือนกับ Text Widget ของ Flutter นั่นแหละ)
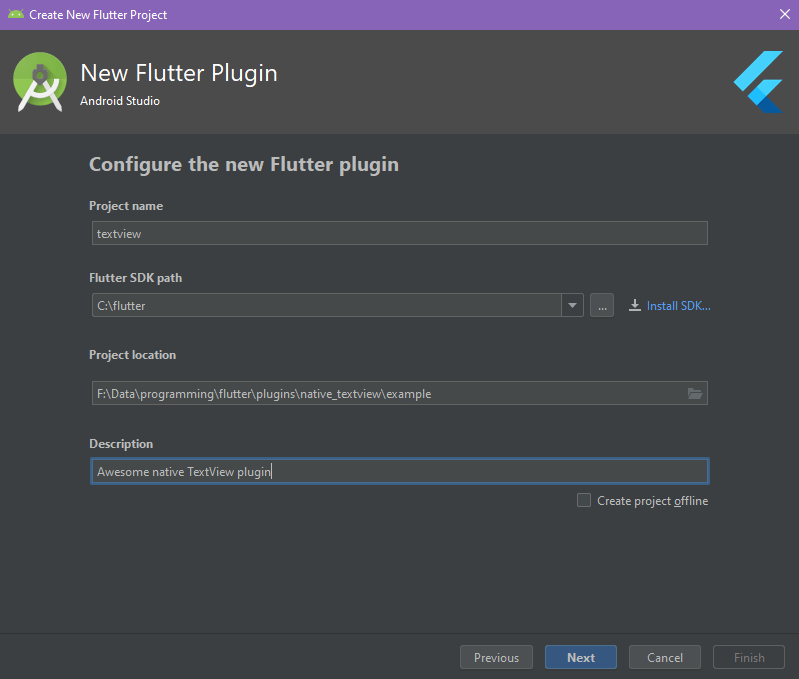
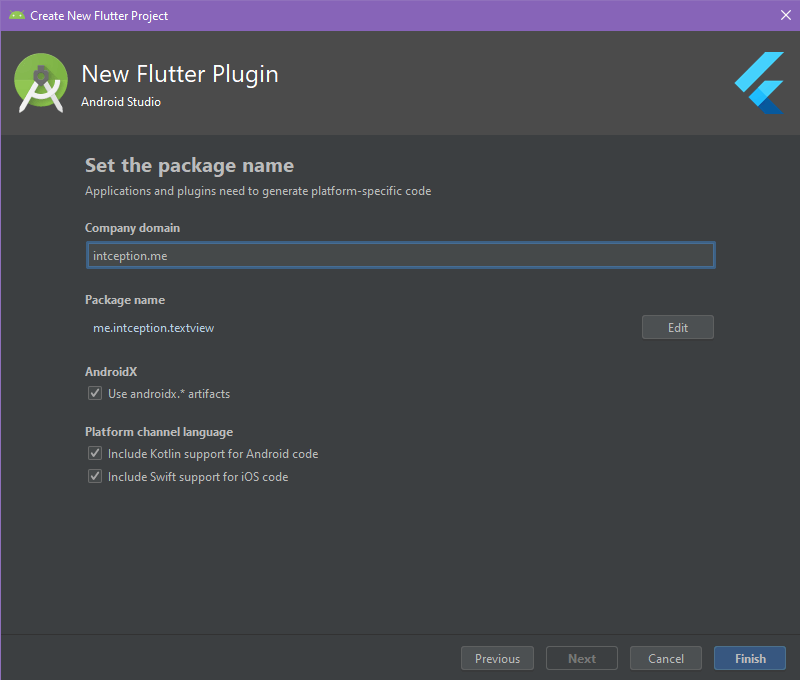
ที่สำคัญคืออย่าลืมติ๊ก Kotlin เพราะเราจะเขียนด้วย Kotlin เสร็จแล้วก็ Finish ได้เลยครับ
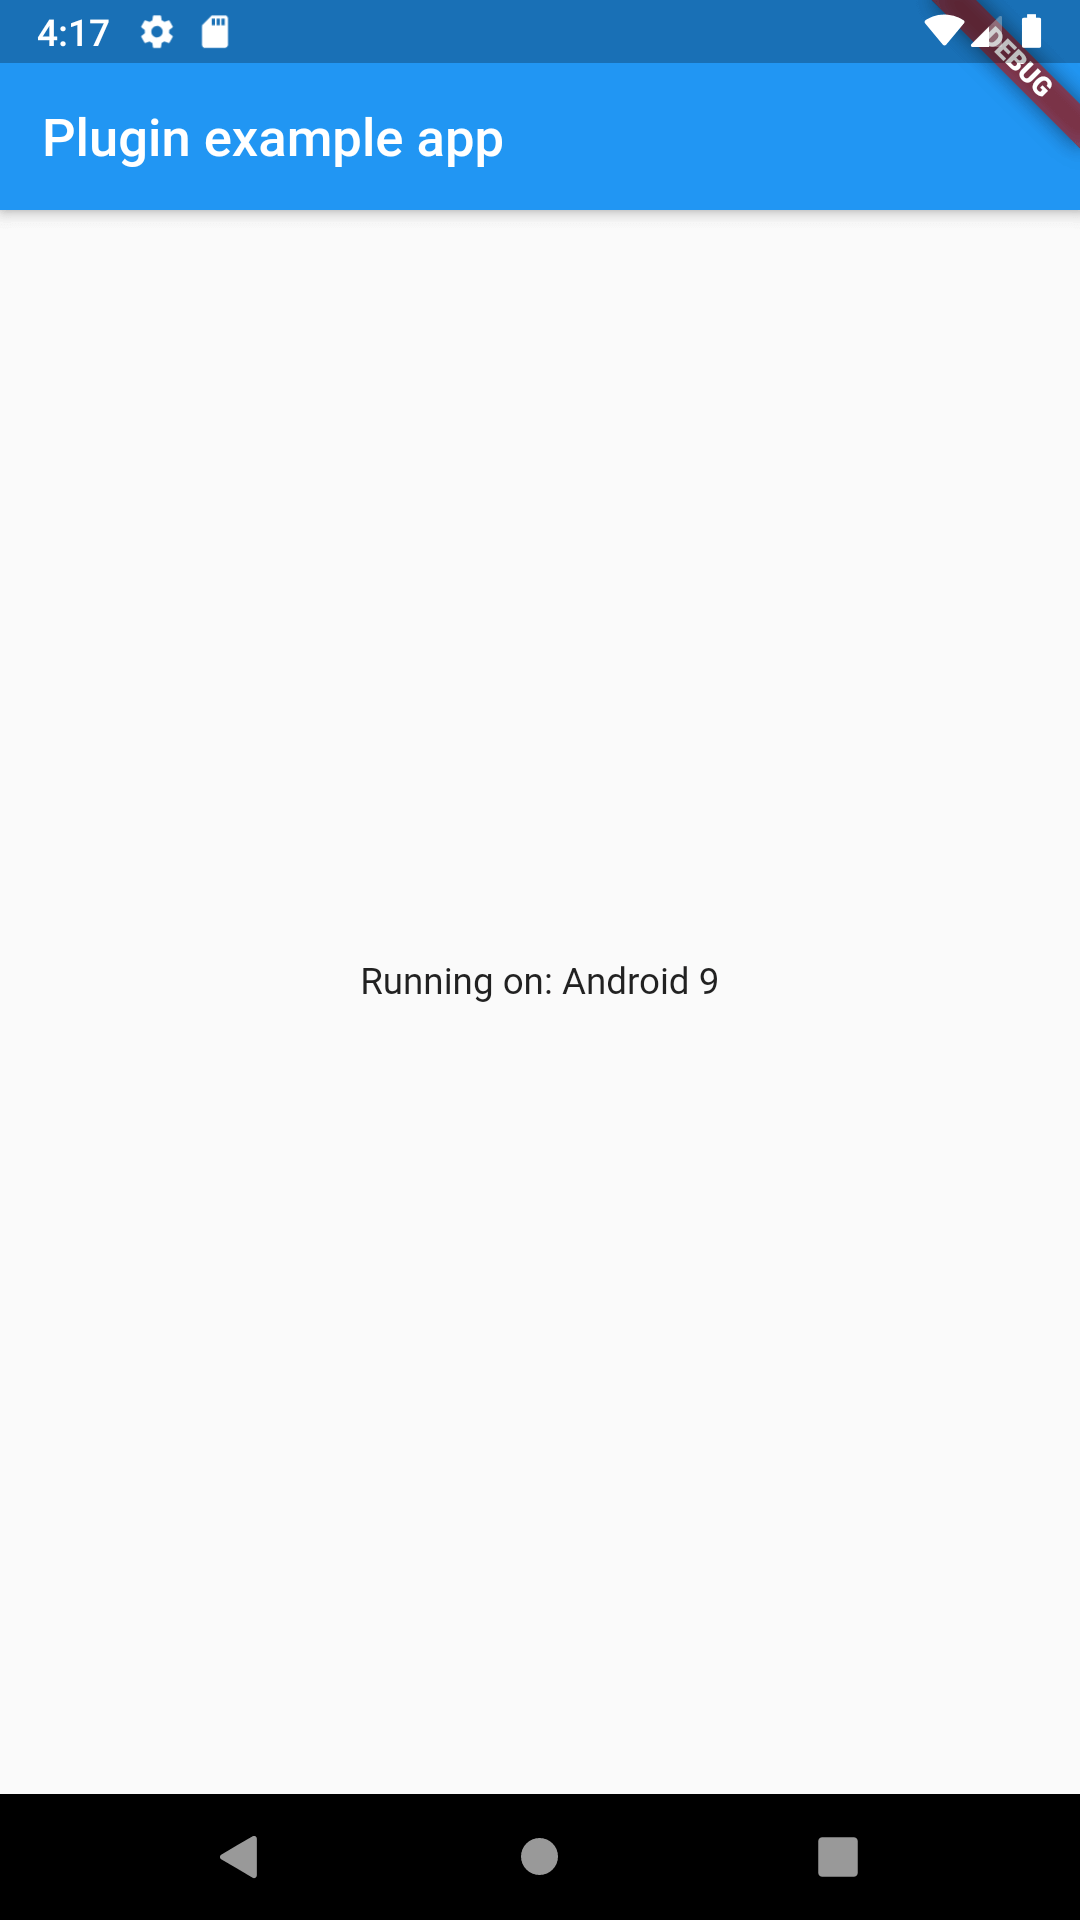
คลิกเลือกไฟล์ example/lib/main.dart แล้วลองรันดู จะต้องได้โปรแกรมหน้าตาตามนี้
# เริ่มเขียน Plugin
ไฟล์ที่เราสนใจจะมี lib/textview.dart ที่เป็นไฟล์ของ Plugin ในฝั่ง Flutter แล้วก็ไฟล์ android/src/main/.../TextviewPlugin.kt เป็นไฟล์ Plugin ในฝั่ง Native Android แล้วก็ไฟล์ example/lib/main.dart ที่เป็นไฟล์สำหรับใช้เขียนตัวอย่างการใช้งานของ Plugin ของเรา ส่วนไฟล์ test/textview_test.dart เป็นไฟล์ทำ Testing ก็เอาเท่าที่สะดวกเลยครับ 🤣
# เขียน Plugin ในฝั่ง Flutter
เริ่มกันโดยเขียนโค้ด Plugin ฝั่ง Flutter กันก่อนครับ ซึ่งเราจะเริ่มจากการสร้าง Widget กันก่อน
คนที่ต้องการใช้ Plugin ของเราก็จะต้องมาเรียกเจ้า Widget ที่เราสร้างขึ้นมานี่ล่ะครับ
# สร้าง Widget
lib/textview.dart
import 'package:flutter/foundation.dart';
import 'package:flutter/widgets.dart';
class TextView extends StatefulWidget {
_TextViewState createState() => _TextViewState();
}
class _TextViewState extends State<TextView> {
Widget build(BuildContext context) {
// defaultTargetPlatform มาจาก library ที่ชื่อ foundation.dart
switch (defaultTargetPlatform) {
case TargetPlatform.android:
return AndroidView(
viewType: 'me.intception.textview',
);
case TargetPlatform.iOS:
return UiKitView(
viewType: 'me.intception.textview',
);
default:
return Text('$defaultTargetPlatform is not supported');
}
}
}
จากไฟล์ข้างต้นเรา ผมได้สร้าง Stateful Widget ไว้หนึ่งตัวชื่อ TextView สิ่งที่ Widget ตัวนี้ build หรือสร้างขึ้นมาก็คือ Widget ที่ชื่อ AndroidView เมื่อเรา Build แอปสำหรับ Android หรือ UiKitView เมื่อเรา Build แอปสำหรับ iOS และเราก็ใส่ default ไว้เผื่อ Plugin ถูกเอาไปใช้ที่อื่น
โดยค่าที่เราจะส่งเข้าไปใน AndroidView หรือ UiKitView นั้นจะเป็นชื่อของ View ที่เรากำลังจะสร้างในภายหลังในฝั่ง Native ครับ
โดยผมตั้งชื่อในรูปแบบนี้เพื่อไม่ให้เกิดการซ้ำกับชื่อ View ของคนอื่น กรณีที่ชื่อ Plugin ของเราโหลเกินครับ
แต่ในที่นี้ผมจะ Comment ในส่วนของ iOS ไปนะครับ
เพราะผมเขียน Native ฝั่ง iOS ไม่เป็น 😂
# กำหนดค่าเริ่มต้นให้กับ Widget
และแน่นอน เมื่อเรากำลังจะสร้าง TextView เพื่อแสดง String หรือ Text
Widget TextView ของเรานั้นก็ต้องรับค่า String เพื่อมาใช้แสดงด้วยครับ
import 'package:flutter/foundation.dart';
import 'package:flutter/services.dart';
import 'package:flutter/widgets.dart';
class TextView extends StatefulWidget {
final String defaultText;
TextView(
this.defaultText, {
Key key,
});
_TextViewState createState() => _TextViewState();
}
class _TextViewState extends State<TextView> {
Widget build(BuildContext context) {
// defaultTargetPlatform มาจาก library ที่ชื่อ foundation.dart
switch (defaultTargetPlatform) {
case TargetPlatform.android:
return AndroidView(
viewType: 'me.intception.textview',
creationParamsCodec: StandardMessageCodec(),
creationParams: widget.defaultText,
);
case TargetPlatform.iOS:
return UiKitView(
viewType: 'me.intception.textview',
creationParamsCodec: StandardMessageCodec(),
creationParams: widget.defaultText,
);
default:
return Text('$defaultTargetPlatform is not supported');
}
}
}
ในที่นี้ผมก็ได้เพิ่ม creationParams เข้าไปครับ แต่เมื่อเรากำหนดค่านี้แล้วเราจำเป็นต้องตั้งค่า creationParamsCodec ด้วย
ค่าที่กำหนดก็แล้วแต่เลยครับ int, String, Array หรือจะอะไรก็แล้วเราจะส่งเลยครับ ซึ่งค่านี้จะถูกเอาไปใช้ตอนที่เราสร้าง View ในฝั่ง Native
ถ้า Plugin เราง่ายๆแค่แสดง Text เฉยๆ แสดงค่าเฉยๆ เราสามารถจบโค้ดในฝั่ง Flutter ได้ที่ตรงนี้เลยครับ
# ตั้งค่าเพื่อให้เราสามารถควบคุม Widget หรือ View ในภายหลัง
แน่นอนผมไม่จบแค่ตั้งค่า Text แล้วจบหรอก ในขั้นตอนถัดไปผมจะเพิ่ม Controller เพื่อที่จะควบคุมตัว View กันครับ
lib/textview.dart
...
// Controller อันนี้สร้างไว้เพื่อที่จะทำให้เราสามารถควบคุม View ในฝั่ง Native ได้
class TextViewController {
  MethodChannel _channel;

  TextViewController(int id) {
    _channel = MethodChannel('me.intception.textview/$id');
  }

  // invokeMethod คืนค่าเป็น Future เราจึงต้องใส่ async ไว้ด้วย
  Future<void> setText(String newText) async {
    assert(newText != null);
    _channel.invokeMethod('setText', newText);
  }
}
...
ตอนนี้ผมสร้าง TextViewController ขึ้นมาครับ เพื่อใช้ควบคุม View ของเรา
ในที่นี้ผมก็จะกำหนดให้ผู้ใช้ Plugin สามารถใช้ setText เพื่อเปลี่ยน Text ในภายหลังได้ครับ
สิ่งสำคัญของ Controller ของเราที่จะต้องมีก็คือการกำหนด MethodChannel เพื่อติดต่อกับ View ที่กำลังจะถูกสร้างขึ้นมา
View แต่ละตัวจะมี Controller ควบคุมแยกกัน โดยหลังจากที่เราสั่งให้สร้าง View ขึ้นมาจะมีการคืนค่า id ออกมาด้วย เราสามารถใช้ค่านี้ในการกำหนด channel การเชื่อมต่อของเราได้
...
class TextView extends StatefulWidget {
final String defaultText;
final Function onCreated;
TextView(
this.defaultText, {
Key key,
this.onCreated
});
_TextViewState createState() => _TextViewState();
}
class _TextViewState extends State<TextView> {
void onPlatFormViewCreated(int id) {
if (widget.onCreated == null) {
return;
}
widget.onCreated(TextViewController(id));
}
Widget build(BuildContext context) {
// defaultTargetPlatform มาจาก library ที่ชื่อ foundation.dart
switch (defaultTargetPlatform) {
case TargetPlatform.android:
return AndroidView(
viewType: 'me.intception.textview',
creationParamsCodec: StandardMessageCodec(),
creationParams: widget.defaultText,
onPlatformViewCreated: onPlatFormViewCreated,
);
case TargetPlatform.iOS:
return UiKitView(
viewType: 'me.intception.textview',
creationParamsCodec: StandardMessageCodec(),
creationParams: widget.defaultText,
onPlatformViewCreated: onPlatFormViewCreated,
);
default:
return Text('$defaultTargetPlatform is not supported');
}
}
}
ในส่วนนี้ผมได้เพิ่ม onPlatformViewCreated เข้ามาครับ เป็น Callback ที่จะถูกทำงานเมื่อ View ถูกสร้างเสร็จแล้ว โดยมันจะส่ง Parameter ที่เป็น int มาให้ด้วยครับ ในที่นี้ผมก็เอาไปสร้าง Controller ของผม
ผู้ใช้ Plugin จะต้องส่ง Callback Function ใส่ onCreated เพื่อที่จะรอรับ Controller ของผมด้วย (หากต้องการ)
ทีนี้มันจะมีปัญหานิดหนึ่งครับ ตรงที่ถ้าเราเขียน final Function onCreated; ลงไป คนที่เรียกใช้จะเห็น Autocomplete ของ onCreated ว่าให้ส่งมาเป็น Function แต่เค้าจะไม่รู้ว่าเรากำหนด Parameter อะไรให้
ผมสามารถแก้ไขโดยเปลี่ยนเป็น ตามนี้แทนครับ
...
typedef void TextViewCreated(TextViewController controller);

class TextViewController {...}

class TextView extends StatefulWidget {
  final String defaultText;
  final TextViewCreated onCreated;
...
typedef เป็นการกำหนด type ใหม่ขึ้นมาในที่นี้ TextViewCreated คือเป็น Type ใหม่ที่หน้าตาเป็น Function แต่มีการกำหนดเลยว่า Function นี้จะคืนค่าเป็น void (ไม่คืนค่า) และจะมีการส่ง Controller กลับไปที่มีหน้าตาเป็น TextViewController ที่เราสร้างไว้
# สุดท้ายโค้ดของเราในฝั่ง Flutter ครับ
import 'package:flutter/foundation.dart';
import 'package:flutter/services.dart';
import 'package:flutter/widgets.dart';
typedef void TextViewCreated(TextViewController controller);
// Controller อันนี้สร้างไว้เพื่อที่จะทำให้เราสามารถควบคุม View ในฝั่ง Native ได้
class TextViewController {
MethodChannel _channel;
TextViewController(int id) {
_channel = MethodChannel('me.intception.textview/$id');
}
// invokeMethod คืนค่าเป็น Future เราจึงต้องใส่ async ไว้ด้วย
Future<void> setText(String newText) async {
assert(newText != null);
_channel.invokeMethod('setText', newText);
}
}
class TextView extends StatefulWidget {
final String defaultText;
final Function onCreated;
TextView(this.defaultText, {Key key, this.onCreated});
_TextViewState createState() => _TextViewState();
}
class _TextViewState extends State<TextView> {
void onPlatFormViewCreated(int id) {
if (widget.onCreated == null) {
return;
}
widget.onCreated(TextViewController(id));
}
Widget build(BuildContext context) {
// defaultTargetPlatform มาจาก library ที่ชื่อ foundation.dart
switch (defaultTargetPlatform) {
case TargetPlatform.android:
return AndroidView(
viewType: 'me.intception.textview',
creationParamsCodec: StandardMessageCodec(),
creationParams: widget.defaultText,
onPlatformViewCreated: onPlatFormViewCreated,
);
case TargetPlatform.iOS:
return UiKitView(
viewType: 'me.intception.textview',
creationParamsCodec: StandardMessageCodec(),
creationParams: widget.defaultText,
onPlatformViewCreated: onPlatFormViewCreated,
);
default:
return Text('$defaultTargetPlatform is not supported');
}
}
}
# ฝั่ง Native ที่เขียนด้วย kotlin
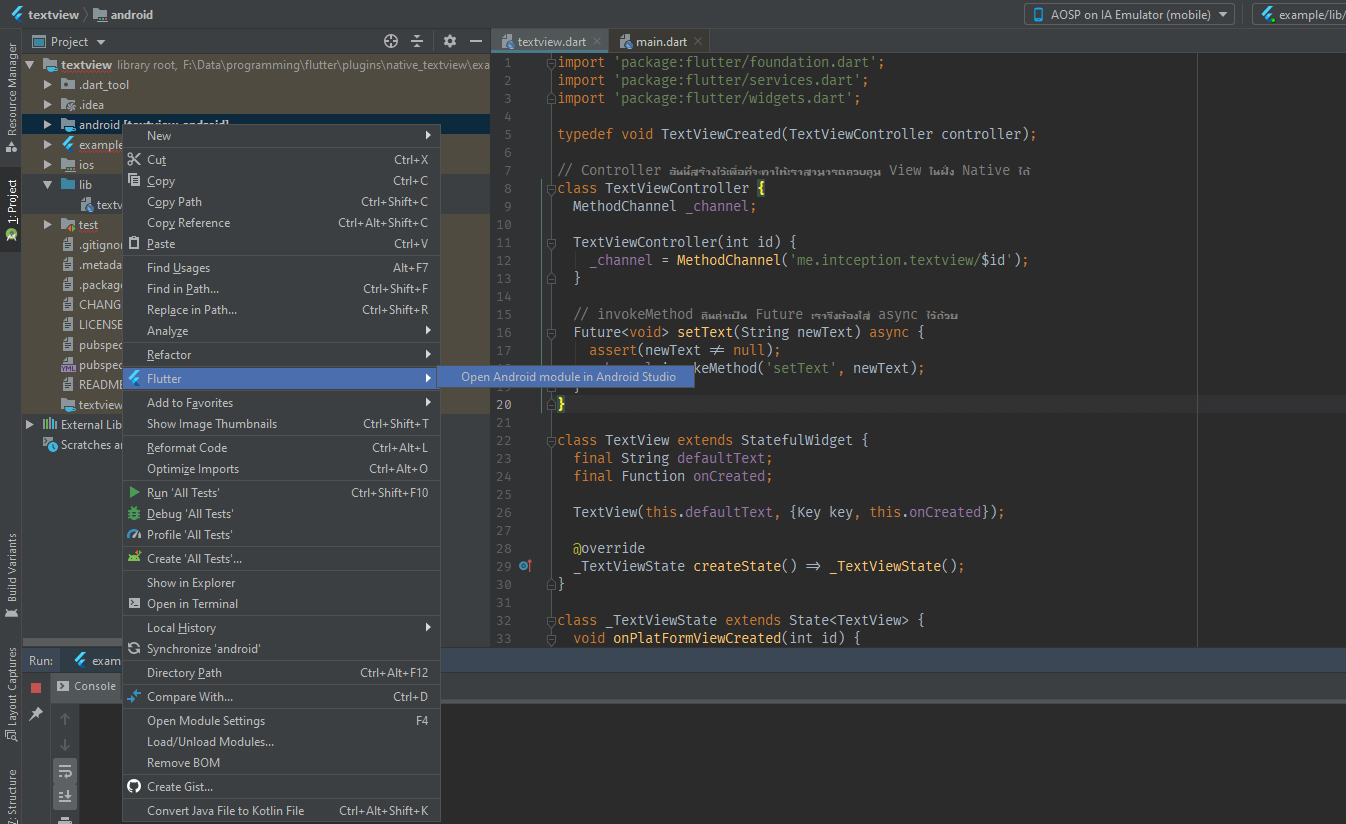
ก่อนที่จะเริ่มเขียน Kotlin นั้น เราต้องเปิด Project Android ขึ้นมาก่อนครับ โดยการคลิกขวาที่โฟลเดอร์ android > Flutter > Open Android module in Android Studio > New Window
# เขียน Plugin
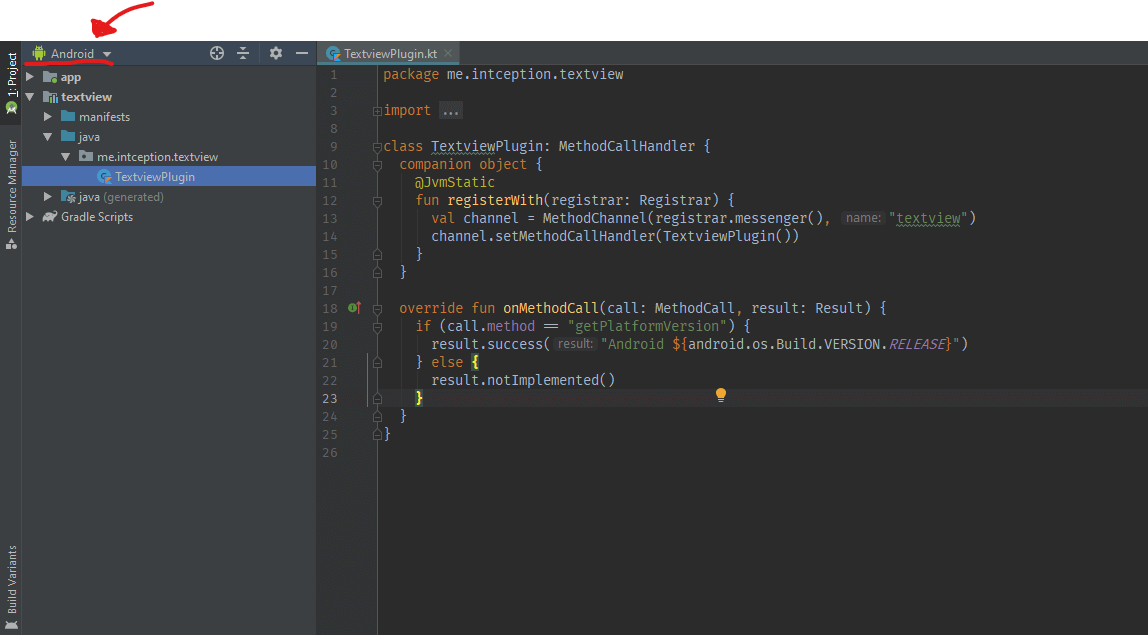
TextviewPlugin.kt
package me.intception.textview

import io.flutter.plugin.common.PluginRegistry.Registrar

class TextviewPlugin {
    companion object {
        @JvmStatic
        fun registerWith(registrar: Registrar) {
            registrar
                .platformViewRegistry()
                .registerViewFactory("me.intception.textview", TextviewFactory(registrar))
        }
    }
}
จากโค้ดเบื้องต้นจะมีการกำหนด PlatformViewFactory (จะถูกสร้างในขั้นตอนถัดไป)
และมีการกำหนดชื่อให้ฝั่งฝั่ง Flutter สามารถเรียกใช้ได้ในชื่อ me.intception.textview
# เขียน PlatformViewFactory ไว้ใช้สร้าง PlatformView
สร้างไฟล์ TextviewFactory.kt ข้างๆไฟล์ TextviewPlugin.kt
package me.intception.textview

import android.content.Context
import io.flutter.plugin.common.PluginRegistry.Registrar
import io.flutter.plugin.common.StandardMessageCodec
import io.flutter.plugin.platform.PlatformView
import io.flutter.plugin.platform.PlatformViewFactory

class TextviewFactory(private val registrar: Registrar): PlatformViewFactory(StandardMessageCodec()) {
    override fun create(context: Context, viewId: Int, args: Any?): PlatformView {
        return MyTextview(registrar, viewId, args.toString());
    }
}
สิ่งที่ PlatformViewFactory ที่ทำคือมันจะสร้าง PlatformView ให้เราเมื่อ AndroidView ในฝั่ง Flutter บอก
และ MyTextview นั้นเราจะเขียนในขั้นตอนถัดไปครับ
# เขียน PlatformView
สร้างไฟล์ MyTextview.kt ข้างๆไฟล์ TextviewPlugin.kt
package me.intception.textview

import android.view.View
import io.flutter.plugin.common.MethodCall
import io.flutter.plugin.common.MethodChannel.MethodCallHandler
import io.flutter.plugin.common.MethodChannel.Result
import io.flutter.plugin.common.PluginRegistry.Registrar
import io.flutter.plugin.platform.PlatformView

class MyTextview(registrar: Registrar, viewId: Int, defaultText: String): PlatformView, MethodCallHandler {
    override fun getView(): View {
        TODO("not implemented") //To change body of created functions use File | Settings | File Templates.
    }

    override fun dispose() {
        TODO("not implemented") //To change body of created functions use File | Settings | File Templates.
    }

    override fun onMethodCall(call: MethodCall, result: Result) {
        TODO("not implemented") //To change body of created functions use File | Settings | File Templates.
    }
}
เมื่อสร้างสิ่งที่เราต้อง override มีด้วยกันทั้งหมด 3 อย่าง ก็คือ
- getView ใช้คืนค่า View ที่เราต้องการแสดง
- dispose ไว้กำหนดตอนที่ PlatformView จะถูกทำลายให้ทำอะไร
- onMethodCall ไว้กำหนด MethodCall ถ้าถูกเรียกโดย Controller ฝั่ง Flutter
เรามาเริ่มกำหนดค่าในแต่ละส่วนกันครับ
...
import android.view.Gravity
import android.widget.TextView

class MyTextview ... {
    private val textView: TextView = getTextView(registrar, defaultText)

    private fun getTextView(registrar: Registrar, text: String): TextView {
        val textView = TextView(registrar.context())
        textView.text = text
        // จัด TextView ไว้กึ่งกลางด้วยการตั้งค่า gravity
        textView.gravity = Gravity.CENTER
        return textView
    }

    override fun getView(): View {
        return textView
    }

    override fun dispose() {}
...
โค้ดด้านบนผมสร้าง getTextView ขึ้นมาเพื่อสร้างและกำหนดค่าเริ่มต้นให้กับ TextView ใหม่
และในส่วน dispose ผมไม่จำเป็นต้องทำลายอะไรก็ปล่อยว่างไปครับ
...
    override fun onMethodCall(call: MethodCall, result: Result) {
        when (call.method) {
            "setText" -> {
                val text = call.arguments.toString()
                textView.text = text
            }
            else -> result.notImplemented()
        }
    }
...
อันนี้เป็นการเขียนรอรับการเรียก invokeMethod จากฝั่ง Flutter ในที่นี้ก็เขียนไว้แค่ setText นี่แหละครับ เรียกเสร็จก็เอาแค่มาเปลี่ยนใน TextView ของเราที่สร้างไว้
ยังเหลืออีกนิดหนึ่งครับ คือเราต้องกำหนดด้วยว่าจะให้เรียกผ่านมาทาง MethodChannel ไหน
...
import io.flutter.plugin.common.MethodChannel

class MyTextview ... {
    private val textView: TextView = getTextView(registrar, defaultText)
    private val channel = MethodChannel(registrar.messenger(), "me.intception.textview/$viewId")

    init {
        channel.setMethodCallHandler(this)
    }
...
# สรุปโค้ดฝั่ง Native
package me.intception.native_textview

import android.view.Gravity
import android.widget.TextView
import io.flutter.plugin.common.MethodCall
import io.flutter.plugin.common.MethodChannel
import io.flutter.plugin.common.MethodChannel.MethodCallHandler
import io.flutter.plugin.common.PluginRegistry.Registrar
import io.flutter.plugin.platform.PlatformView

class NativeTextView(context: Context?, registrar: Registrar, id: Int, text: String?) : PlatformView, MethodCallHandler {

    private var channel: MethodChannel = MethodChannel(registrar.messenger(), "me.intception/textview_$id")
    private var textView: TextView = getTextView(registrar)

    init {
        textView.text = text
        textView.gravity = Gravity.CENTER
        channel.setMethodCallHandler(this)
    }

    override fun getView(): TextView {
        return textView
    }

    override fun dispose() {
    }

    override fun onMethodCall(call: MethodCall, result: MethodChannel.Result) {
        when (call.method) {
            "setText" -> {
                val text = call.arguments.toString()
                textView.text = text
            }
            else -> result.notImplemented()
        }
    }

    private fun getTextView(registrar: Registrar): TextView {
        return TextView(registrar.context())
    }
}
# มาเขียนไฟล์ Example กันครับ
example/lib/main.dart
import 'package:flutter/material.dart';
import 'package:textview/textview.dart';
void main() => runApp(MyApp());
class MyApp extends StatefulWidget {
_MyAppState createState() => _MyAppState();
}
class _MyAppState extends State<MyApp> {
TextEditingController _textEditController = TextEditingController();
TextViewController _textViewController;
void initState() {
super.initState();
}
Widget build(BuildContext context) {
return MaterialApp(
home: Scaffold(
appBar: AppBar(
title: const Text('Plugin example app'),
),
body: Column(
children: <Widget>[
Padding(
padding: const EdgeInsets.symmetric(horizontal: 8.0),
child: Row(
mainAxisAlignment: MainAxisAlignment.spaceAround,
mainAxisSize: MainAxisSize.max,
children: <Widget>[
Expanded(
child: TextField(
controller: _textEditController,
),
),
SizedBox(
width: 10.0,
),
RaisedButton(
onPressed: () {
_textViewController.setText(_textEditController.text);
},
child: Text('Set text'),
)
],
),
),
Container(
height: 100.0,
alignment: Alignment.center,
color: Colors.blueAccent,
child: SizedBox(
child: TextView(
'Default Text',
onCreated: (TextViewController controller) {
_textViewController = controller;
},
),
),
),
],
),
),
);
}
}
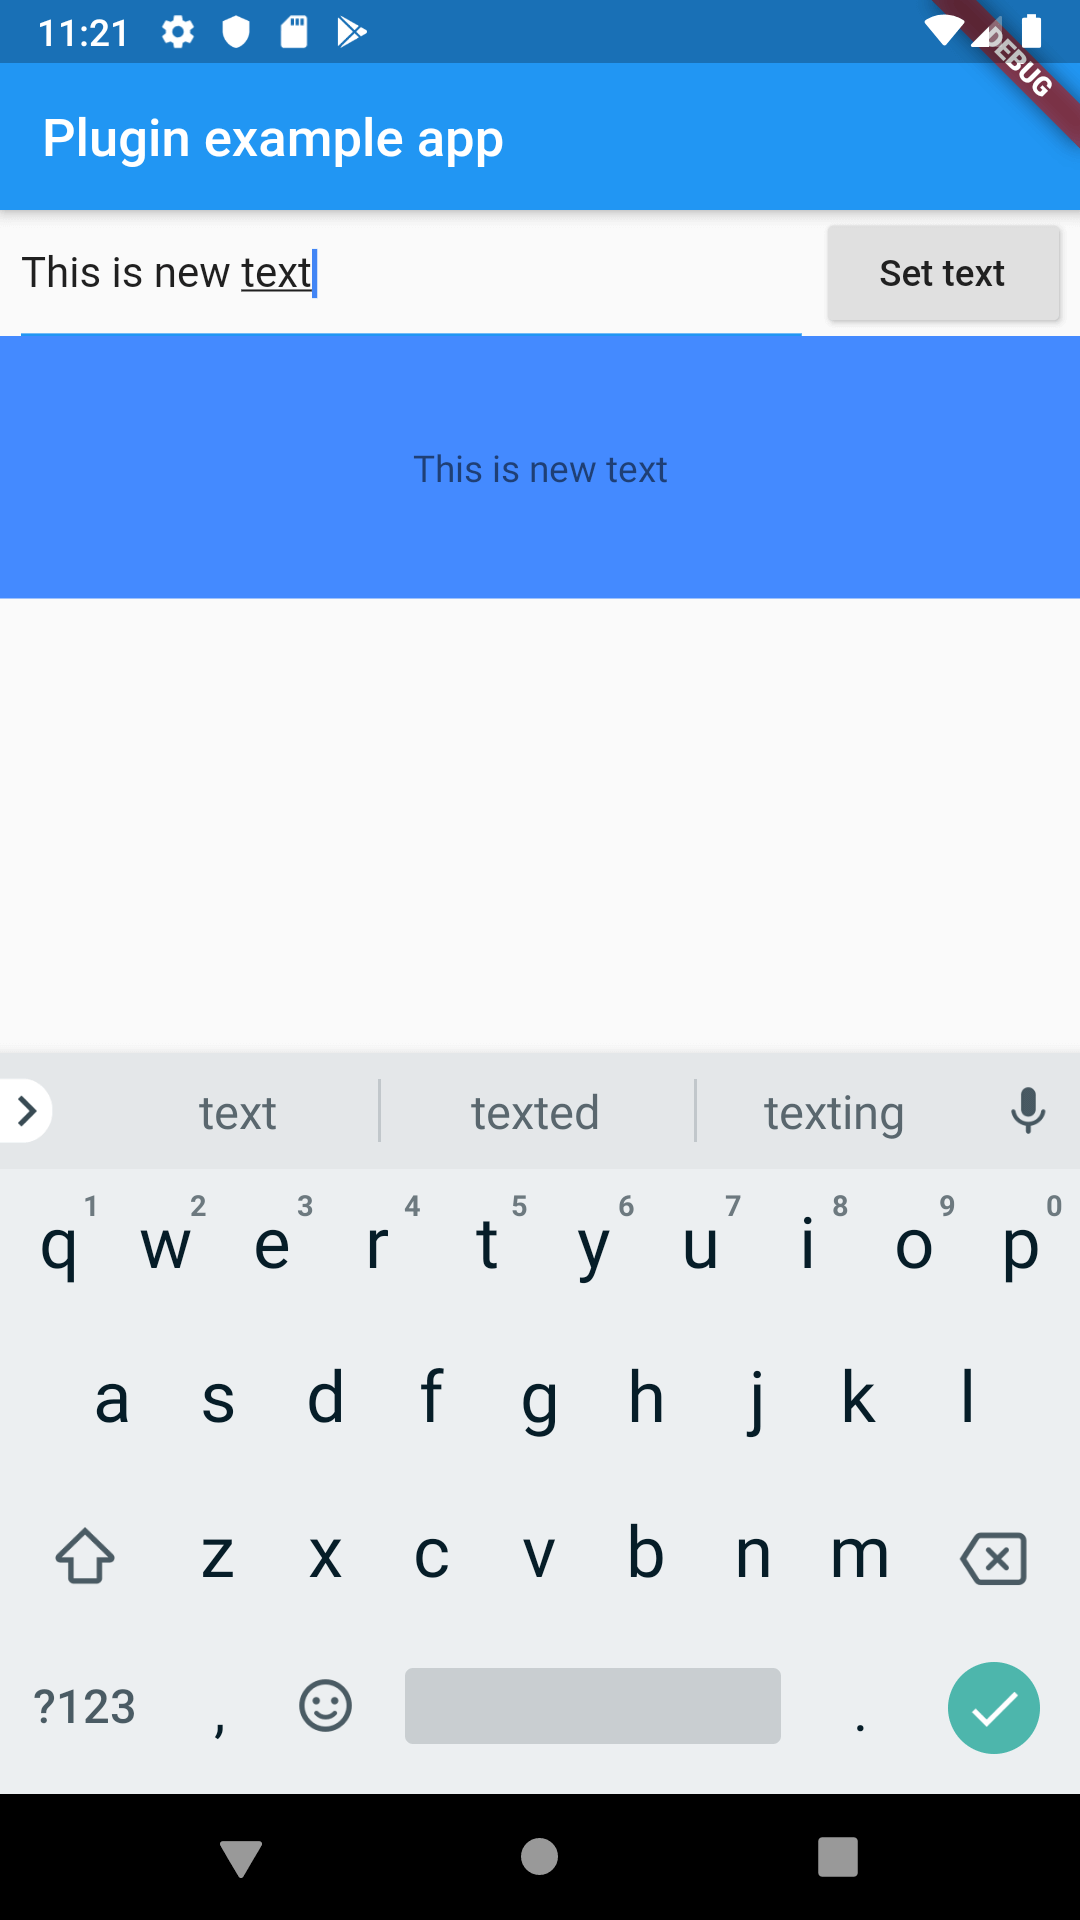
ส่วนที่ควรสนใจจาก Example ก็คือ ส่วนของการเรียกใช้งาน Widget TextView ที่ผมสร้างไว้
TextView(
  'Default Text',
  onCreated: (TextViewController controller) {
    _textViewController = controller;
  },
)
และ การสั่ง setText เมื่อผู้ใช้กดปุ่ม
RaisedButton(
  onPressed: () {
    _textViewController.setText(_textEditController.text);
  },
  child: Text('Set text'),
)
เราสามารถกำหนดขนาดของ PlatformView ที่เราสร้างได้โดยการครอบมันด้วย SizedBox หรือ Container ครับ
# เอา Plugin มาใช้งานจริง
ในโปรเจคที่เราต้องการใช้งานนั้น เราแค่เพิ่ม dependencies ในไฟล์ pubspec.yaml ก็ได้แล้วครับ
dependencies:
  textview:
    path: ./path/to/plugin/root
ดาวน์โหลด Source Code ที่นี่ (opens new window)
# สรุป
อาจจะงงๆหน่อยนะครับ แต่ในหลายๆส่วนถ้าเราเคยเขียนสักครั้งนึงแล้ว การทำครั้งถัดๆไปจะไม่ยากครับเพราะมันเหมือนกันแทบจะหมดเลย ถ้าหากมีข้อสงสัยอะไรสามารถติดต่อผ่าน Facebook Page (opens new window) ของผมได้ครับ