# ลองใช้ Google Fonts อะไรมันจะง่ายขนาดนี้
#Dev#Flutter#Ui#Google#Fontเปลี่ยนการเรียกใช้ Custom Fonts (opens new window) ที่วุ่นวาย(นิดหน่อย)ให้ง่ายขึ้นกว่าเดิม ทาง Flutter ได้เปิดตัว Package สำหรับเรียกใช้ Google Fonts (opens new window) ได้ง่ายมากๆโดยที่เราไม่ต้องโหลดไฟล์ฟอนต์มาเองเลย
ตัว Package จะทำการโหลดฟอนต์ที่แอปต้องใช้แล้ว Cache ไว้ในครั้งแรก ครั้งถัดไปก็ไม่ต้องโหลดอีกรอบแล้ว ข้อดีที่เห็นได้ชัดๆเลยก็คือขนาดของ apk ที่เล็กลงขึ้นเล็กน้อย
Package Google Fonts จะรองรับบน Flutter เวอร์ชัน 1.12 ขึ้นไป

# สร้างโปรเจค
flutter create font_usage
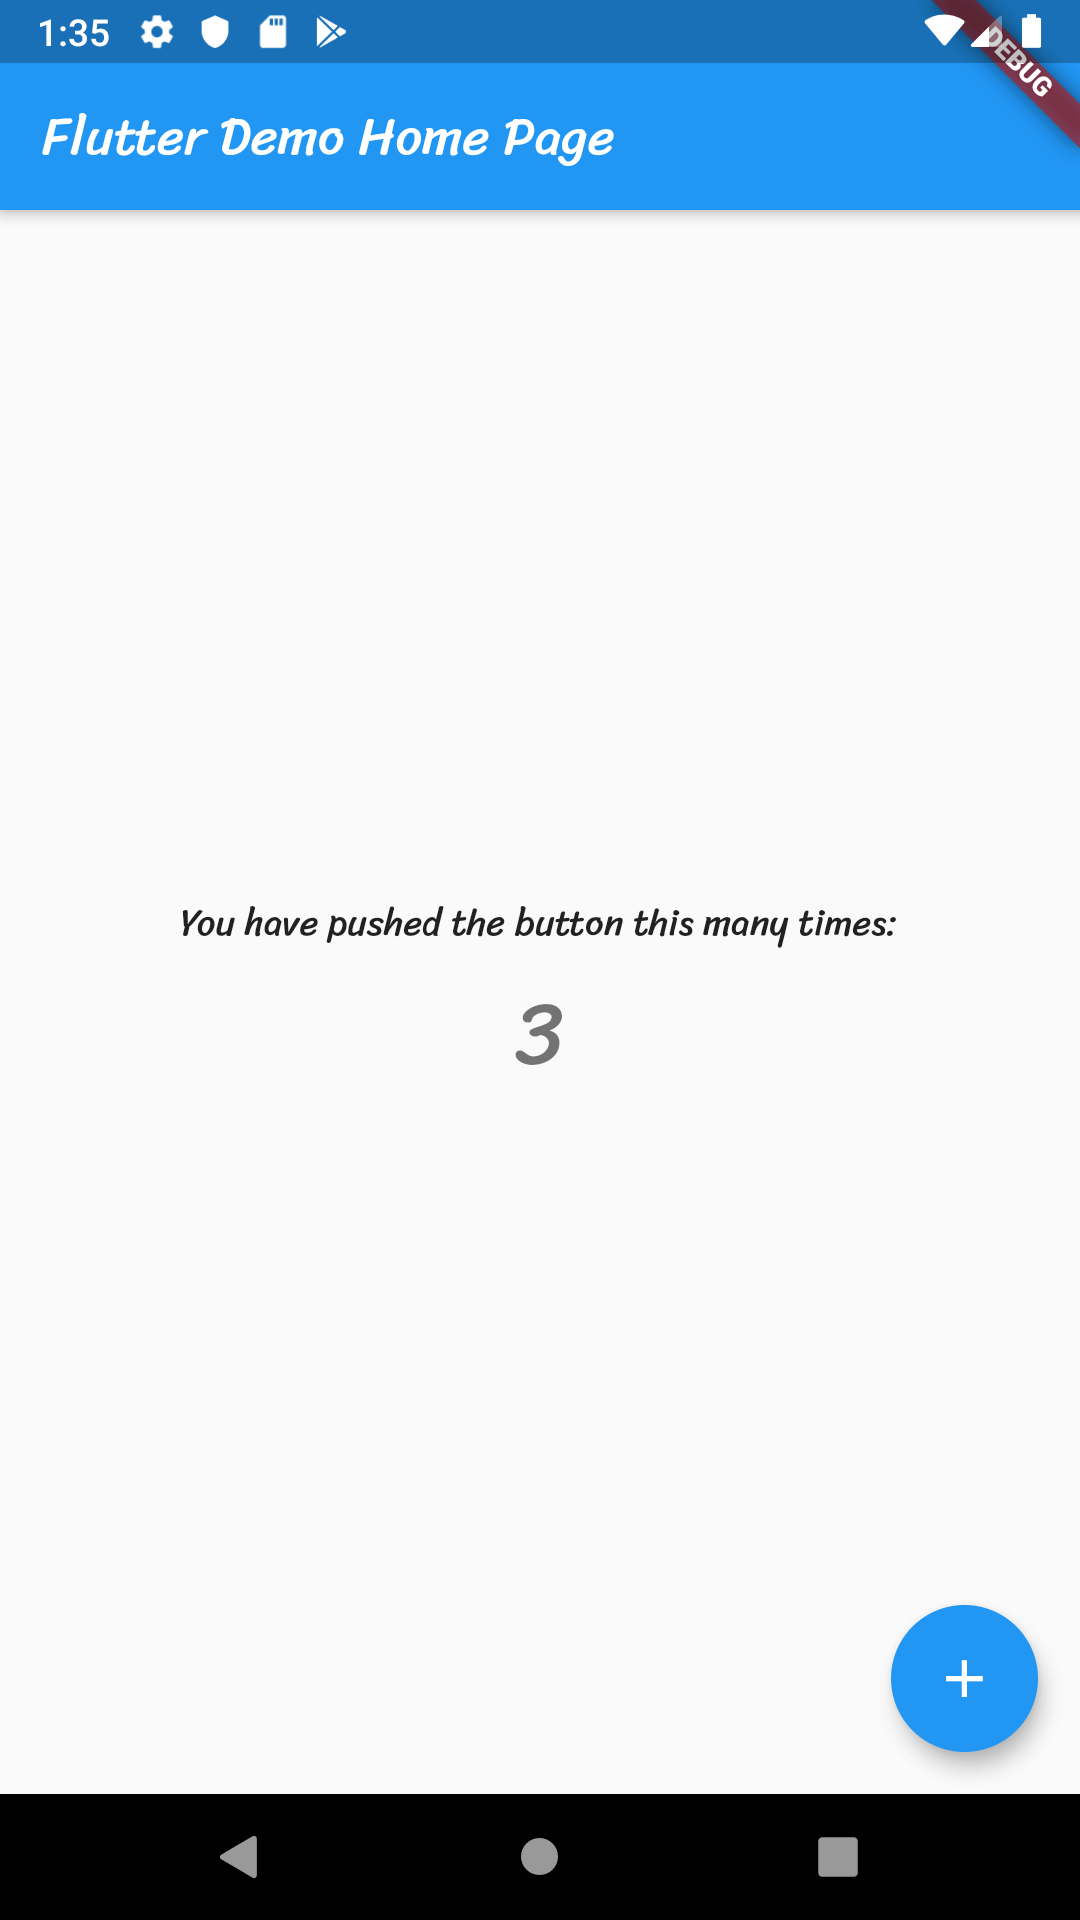
ไฟล์เริ่มต้น lib/main.dart ก็ตามนี้ครับ
import 'package:flutter/material.dart';
void main() => runApp(MyApp());
class MyApp extends StatelessWidget {
Widget build(BuildContext context) {
return MaterialApp(
title: 'Flutter Demo',
theme: ThemeData(
primarySwatch: Colors.blue,
),
home: MyHomePage(title: 'Flutter Demo Home Page'),
);
}
}
class MyHomePage extends StatefulWidget {
MyHomePage({Key key, this.title}) : super(key: key);
final String title;
_MyHomePageState createState() => _MyHomePageState();
}
class _MyHomePageState extends State<MyHomePage> {
int _counter = 0;
void _incrementCounter() {
setState(() {
_counter++;
});
}
Widget build(BuildContext context) {
return Scaffold(
appBar: AppBar(
title: Text(widget.title),
),
body: Center(
child: Column(
mainAxisAlignment: MainAxisAlignment.center,
children: <Widget>[
Text(
'You have pushed the button this many times:',
),
Text(
'$_counter',
style: Theme.of(context).textTheme.display1,
),
],
),
),
floatingActionButton: FloatingActionButton(
onPressed: _incrementCounter,
tooltip: 'Increment',
child: Icon(Icons.add),
),
);
}
}
# เริ่มใช้ Google Fonts
สามารถไปเลือกหาฟอนต์ที่อยากใช้กันได้ครับใน Google Fonts (opens new window) โดยผมจะเลือกใช้ฟอนต์ที่ดูมีความเปลี่ยนแปลงมากๆแล้วกันครับ เช่น sriracha, pattaya
# ติดตั้ง Google Fonts Package
pubspec.yaml
...
dependencies:
  flutter:
    sdk: flutter
  google_fonts: ^0.2.0
...
# Import แพ็คเกจก่อนเลย
lib/main.dart
import 'package:flutter/material.dart';
import 'package:google_fonts/google_fonts.dart';
...
# ตั้งฟอนต์แบบ Global ไปเลยโดนกันหมด
ทำโดยการไปตั้งค่าใน ThemeData
...
return MaterialApp(
  title: 'Flutter Demo',
  theme: ThemeData(
    primarySwatch: Colors.blue,
    textTheme: GoogleFonts.srirachaTextTheme(
      Theme.of(context).textTheme,  // ถ้าไม่ใส่ มันจะตั้งค่า Default ทุกอย่างตาม ThemeData.light().textTheme
    ),
  ),
  home: MyHomePage(title: 'Flutter Demo Home Page'),
);
...
ผลที่ได้ก็คือ...

จะเห็นได้ว่าฟอนต์ในส่วน AppBar มันไม่ยอมเปลี่ยน!!
ถ้าเราไปเปิด Docs ดูก็จะพบว่า AppBar ถ้าไม่มีการตั้งค่าเกี่ยวกับ Theme หรือ Style มันจะไปดึง primaryTextTheme เพราะงั้นเราจะต้องตั้งค่าเพิ่มอีกนิดครับ
...
return MaterialApp(
  title: 'Flutter Demo',
  theme: ThemeData(
    primarySwatch: Colors.blue,
    textTheme: GoogleFonts.srirachaTextTheme(
      Theme.of(context).textTheme,  // ถ้าไม่ใส่ มันจะตั้งค่า Default ทุกอย่างตาม ThemeData.light().textTheme
    ),
    primaryTextTheme: GoogleFonts.srirachaTextTheme(
      Theme.of(context).primaryTextTheme,  // ถ้าไม่ใส่ มันจะตั้งค่า Default ทุกอย่างตาม ThemeData.light().textTheme
    ),
  ),
  home: MyHomePage(title: 'Flutter Demo Home Page'),
);
...
คราวนี้ฟอนต์ในส่วน AppBar ก็จะเปลี่ยนตามแล้วครับ
# ตั้งฟอนต์แค่บางส่วน
ก็ไม่ได้ยากอะไรครับ สมมติผมอยากเปลี่ยนฟอนต์ของตัวเลข
ผมก็จะลองเปลี่ยน Theme.of(context).textTheme.display1 เป็น GoogleFonts.pattaya()
...
body: Center(
  child: Column(
    mainAxisAlignment: MainAxisAlignment.center,
    children: <Widget>[
      Text(
        'You have pushed the button this many times:',
      ),
      Text(
        '$_counter',
        style: GoogleFonts.pattaya(),
      ),
    ],
  ),
),
...

จะพบว่าตัวเลขเหลือเล็กกระจิ๋วเดียวเอง... ผมเลยทำการ merge หรือเอาค่า display1 เดิมมารวมกับฟอนต์ของเรา จะได้เป็น
...
Text(
  '$_counter',
  style: Theme.of(context)
      .textTheme
      .display1
      .merge(GoogleFonts.pattaya())
),
...
เป็นการเอา textTheme.display1 มาแล้วเอาค่าของ GoogleFonts.pattaya() มาทับ
ซึ่งมันก็คือทุกอย่างเหมือน display1 เปลี่ยนแค่ FontFamily นั่นล่ะครับ

แต่จริงๆแล้วเราก็สามารถกำหนดค่าลงไปใน GoogleFonts.pattaya() เองได้เช่นกัน แต่ที่ทำวิธีนี้เพื่อให้ง่ายในการดึงค่าตาม Theme ที่เราตั้งไว้
# Source Code
ดาวน์โหลด Source Code ที่นี่ (opens new window)
# Bug ที่พบเจอ (Update 13/01/2020)
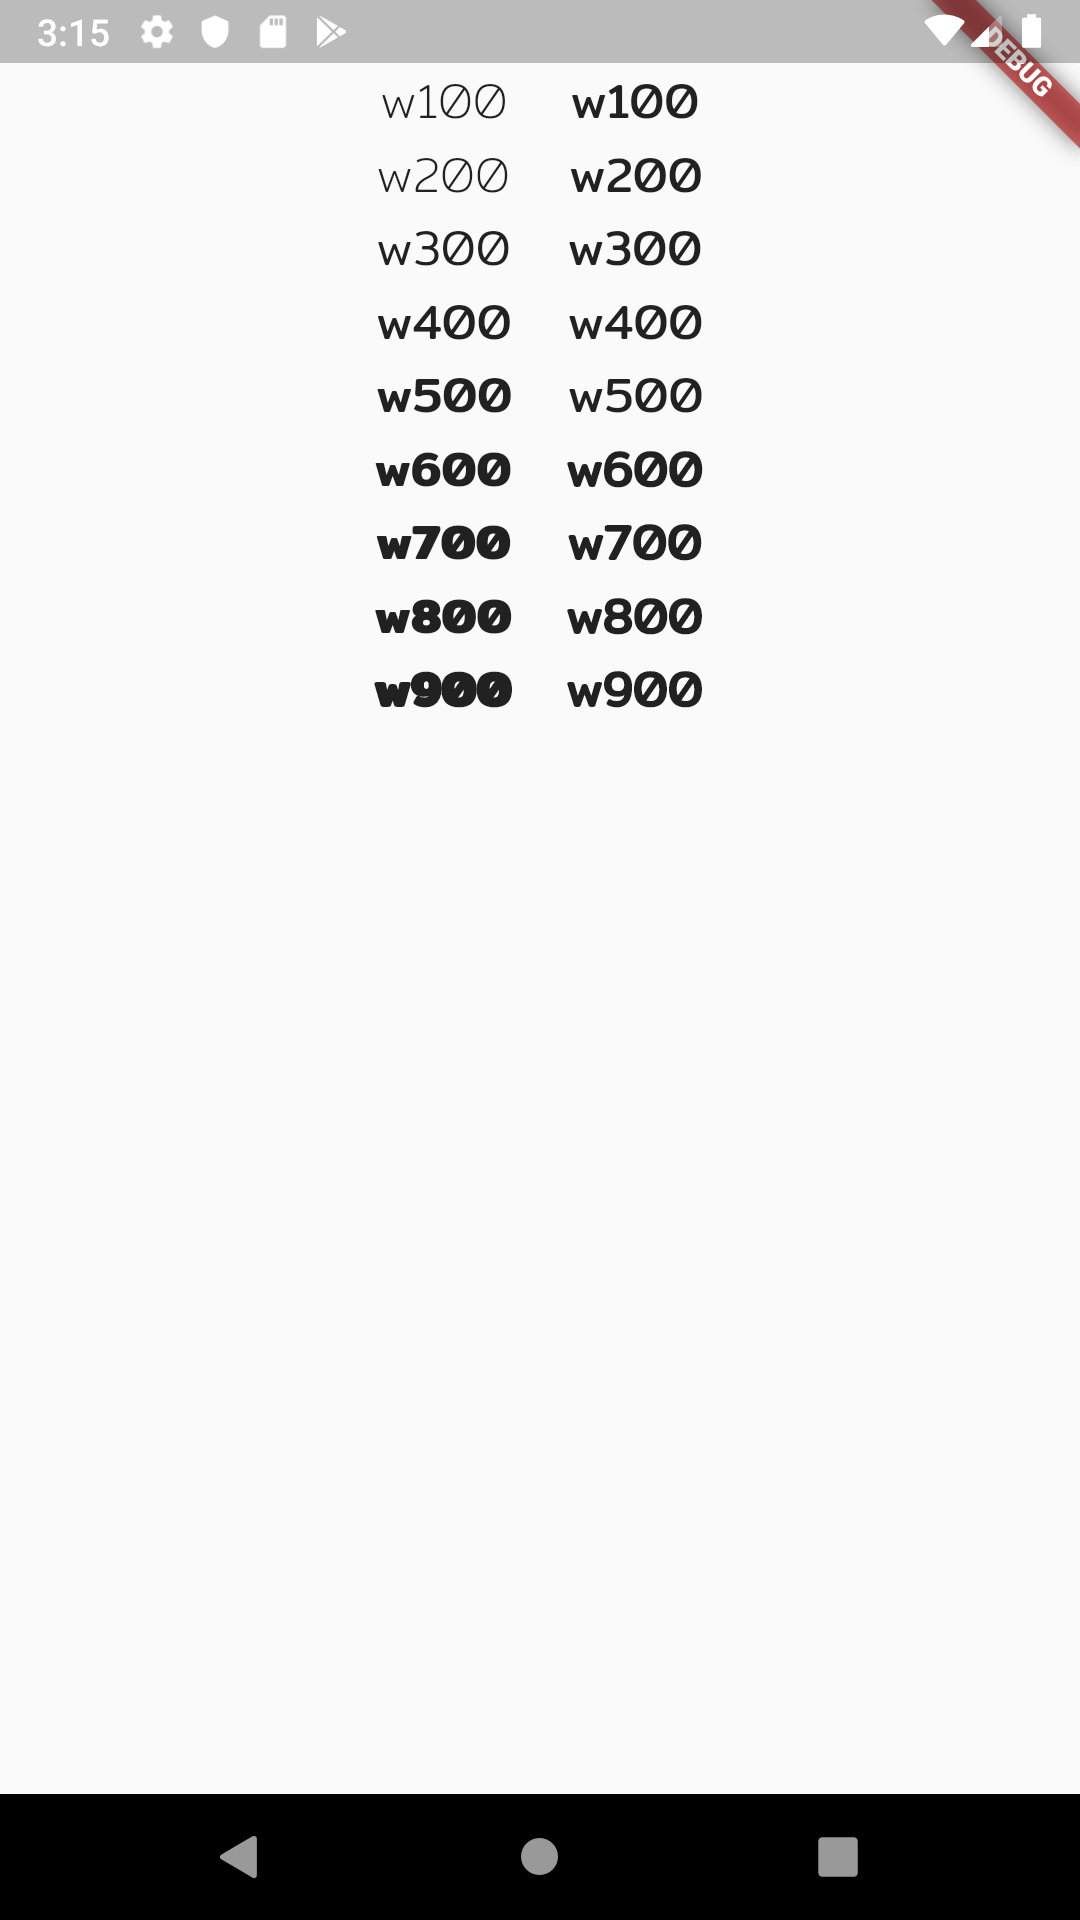
ไม่รู้จะเรียกว่ารัก...เอ้ยบัคดีรึเปล่า ถ้าหากคุณใช้ในรูปแบบ xxxTextTheme นั้น ตัว Library จะตั้ง Google Fonts ให้เราแค่ตัว regular เท่านั้น เช่น ถ้าผมใช้ mitrTextTheme ตัว Library จะตั้งค่าให้แค่ Mitr_Regular เท่านั้นครับ
ดังนั้น ถ้าหากต้องการใช้ FontWeight ที่น้อยหรือมากกว่า 400 ให้ใช้วิธีกำหนดในแต่ละที่ที่ต้องการใช้เองเท่านั้นครับ ดังนี้
ตัวอย่างเปรียบเทียบ
import 'package:flutter/material.dart';
import 'package:google_fonts/google_fonts.dart';
main() => runApp(MyApp());
class MyApp extends StatelessWidget {
Widget build(BuildContext context) {
return MaterialApp(
theme: ThemeData(
textTheme: GoogleFonts.mitrTextTheme(),
),
home: Scaffold(
body: SafeArea(
child: Container(
constraints: BoxConstraints.expand(),
child: Row(
mainAxisAlignment: MainAxisAlignment.center,
children: <Widget>[
Column(
children: <Widget>[
Text('w100',
style: GoogleFonts.mitr(
fontSize: 18.0, fontWeight: FontWeight.w100)),
Text('w200',
style: GoogleFonts.mitr(
fontSize: 18.0, fontWeight: FontWeight.w200)),
Text('w300',
style: GoogleFonts.mitr(
fontSize: 18.0, fontWeight: FontWeight.w300)),
Text('w400',
style: GoogleFonts.mitr(
fontSize: 18.0, fontWeight: FontWeight.w400)),
Text('w500',
style: GoogleFonts.mitr(
fontSize: 18.0, fontWeight: FontWeight.w500)),
Text('w600',
style: GoogleFonts.mitr(
fontSize: 18.0, fontWeight: FontWeight.w600)),
Text('w700',
style: GoogleFonts.mitr(
fontSize: 18.0, fontWeight: FontWeight.w700)),
Text('w800',
style: GoogleFonts.mitr(
fontSize: 18.0, fontWeight: FontWeight.w800)),
Text('w900',
style: GoogleFonts.mitr(
fontSize: 18.0, fontWeight: FontWeight.w900)),
],
),
SizedBox(
width: 20.0,
),
Column(
children: <Widget>[
Text('w100',
style: TextStyle(
fontSize: 18.0, fontWeight: FontWeight.w100)),
Text('w200',
style: TextStyle(
fontSize: 18.0, fontWeight: FontWeight.w200)),
Text('w300',
style: TextStyle(
fontSize: 18.0, fontWeight: FontWeight.w300)),
Text('w400',
style: TextStyle(
fontSize: 18.0, fontWeight: FontWeight.w400)),
Text('w500',
style: TextStyle(
fontSize: 18.0, fontWeight: FontWeight.w500)),
Text('w600',
style: TextStyle(
fontSize: 18.0, fontWeight: FontWeight.w600)),
Text('w700',
style: TextStyle(
fontSize: 18.0, fontWeight: FontWeight.w700)),
Text('w800',
style: TextStyle(
fontSize: 18.0, fontWeight: FontWeight.w800)),
Text('w900',
style: TextStyle(
fontSize: 18.0, fontWeight: FontWeight.w900)),
],
)
],
),
),
),
),
);
}
}
ผลลัพธ์ที่ได้จะเห็นว่าด้านซ้ายผมกำหนดค่า Font ลงในแต่ละ Text เลยจะสามารถกำหนด FontWeight ได้อิสระ แต่ในฝั่งขวานั้นจะมีแค่ FontWeight แบบ Regular (400) เท่านั้น ... และ Font ในแบบหนาขึ้นไป 1 ระดับ